4 Strength Moves Every Runner Needs (No Gym Required)
You do not need a gym membership or any equipment to build the strength that keeps runners healthy and improves their performance. Four moves, two short sessions a week, done anywhere.
· 7 min read · Training
Most runners know they should be doing strength work. Most runners are also not doing it, because the barrier feels too high. A gym membership, a program to follow, equipment to buy, and time carved out of a schedule already packed with running.
Here is the thing: you need none of that.
The four movements that cover the vast majority of what runners need from strength training can be done at home, in a park, or in any hotel room. No barbells, no machines, no gym. Two short sessions per week of maybe 20 minutes each. That is the minimum effective dose to reduce injury risk and improve how you run.
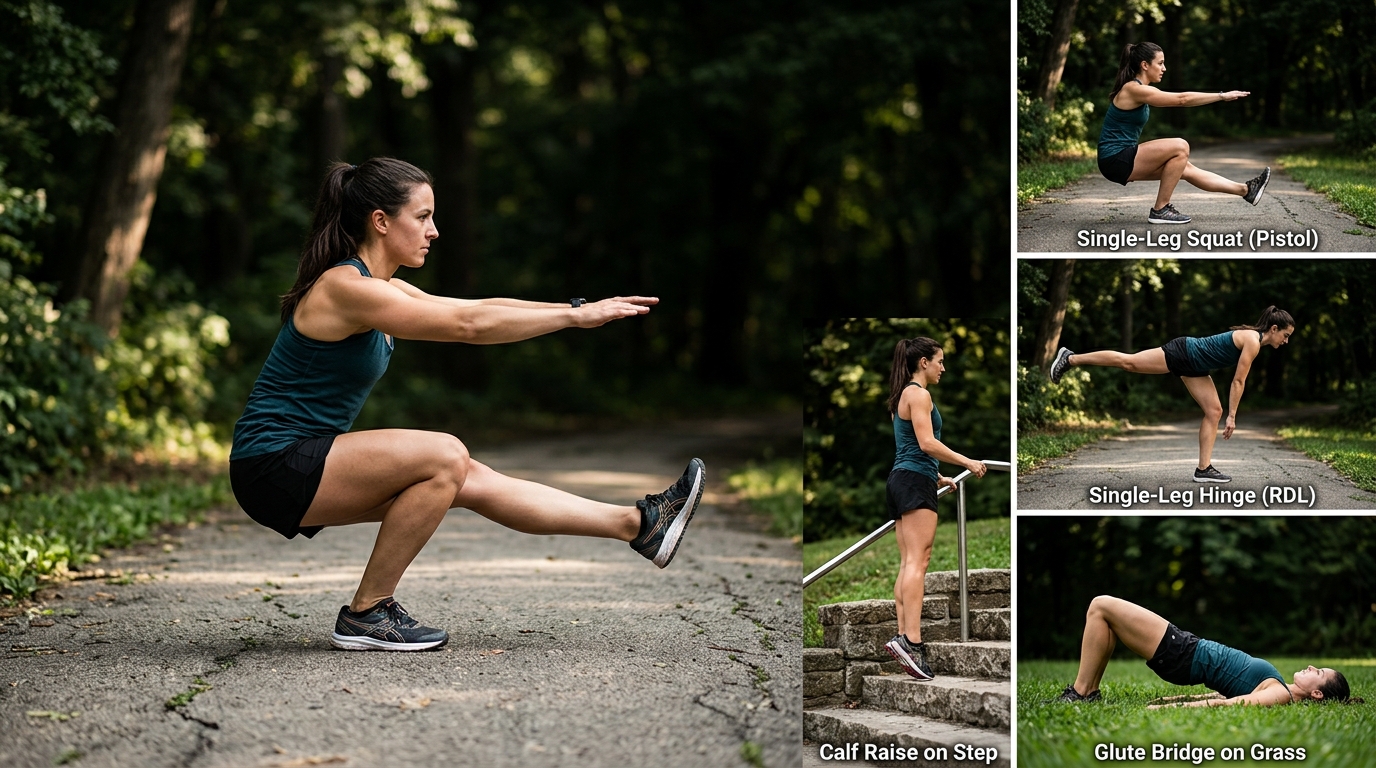
Why these four and not a long list
There is no shortage of exercises suggested for runners - hip circles, resistance band work, balance drills, clamshells, monster walks, and everything else you find on running Instagram. Some of those have value. None of them are the core.
The four movements below target the actual failure points for most running injuries: single-leg strength imbalance, posterior chain weakness, calf and Achilles resilience, and hip extension power. These are the structures that absorb force on every footstrike and generate propulsion on every push-off. When they are weak or out of balance, the body compensates in ways that cause knee pain, Achilles problems, IT band issues, and hip flexor tightness.
Four exercises does not mean four is the magic number. It means four is the minimum that covers all the main bases without turning strength training into a second full-time training program.
If you are already doing a full lifting program, the separate article on strength training for runners covers the gym-based heavy lifting approach with barbells and specific loading recommendations. This post is for the runner who wants a practical, no-equipment starting point.
1. Split squats
!Runner performing a bodyweight split squat in a park

This is the single most valuable exercise on the list for runners.
Running is entirely a single-leg activity. Every step you take is a single-leg landing. Any bilateral exercise - regular squats with two feet on the ground - is useful but does not expose the single-leg weakness that running reveals. The split squat changes that.
Stand with one foot roughly a full stride ahead of the other. Lower the back knee toward the floor while keeping the front shin roughly vertical and your torso tall. Return to standing. That is one rep.
What makes this exercise specific to running is the instability of the single-leg stance. Your hip abductors, the muscles on the outside of the hip and glute, have to work hard to stop the front knee from caving inward. Your quad drives the primary movement. Your core manages the torso position. It looks like a simple exercise and it targets almost every weakness pattern that leads to running injuries.
Start with bodyweight. Three sets of 8 to 10 per leg is a reasonable starting point. When bodyweight becomes easy, add a backpack with books in it, hold water bottles, or progress to a rear-foot-elevated split squat (Bulgarian split squat) with the back foot on a couch or step.
2. Single-leg hinges

The hamstrings and glutes are your primary propulsion muscles in running. They drive push-off and decelerate the leg during landing. They are also among the most commonly underpowered muscle groups in recreational runners, who spend most of their day sitting in hip flexion.
The single-leg hinge targets these directly. Stand on one leg with a soft bend in the knee. Hinge at the hip, keeping your back flat, and lower your torso toward the floor while the free leg extends behind you like a counterbalance. Return to standing by driving through the glute of the standing leg.
This exercise challenges not just the posterior chain but also balance and proprioception - your ability to sense where your body is in space. That balance demand is highly specific to running because every landing happens on one leg, and the neuromuscular control of that single-leg landing is partly what determines whether you stay injury-free.
Three sets of 8 per leg with bodyweight is a starting point. Add a dumbbell, kettlebell, or loaded backpack when this becomes easy. Slow down the descent to increase difficulty without adding load.
3. Calf raises (on a step)
!Close-up of a runner performing a single-leg calf raise on a concrete step

Runners are chronically undertrained in the calf complex. Specifically the soleus - the deeper calf muscle that works primarily during the stance phase of running - is rarely developed adequately by running alone. Plantar fasciitis and Achilles tendinopathy are both partly a consequence of insufficient Achilles and calf loading capacity relative to the demands of running volume.
Single-leg calf raises on a step are the remedy. Find any step where you can drop your heel below the level of the step. Stand on one foot. Lower your heel as far as it comfortably goes, then rise onto your toes. Lower slowly - three to four seconds on the way down is the target. This eccentric loading phase is what actually builds tendon resilience, not just the upward movement.
Three sets of 12 to 15 per leg. If this is pain-free and easy after two weeks, hold a water bottle in the same-side hand for added load. If you have been dealing with Achilles or plantar fascia issues, this is one of the most evidence-backed rehabilitation exercises available.
Do not skip this one because it looks like the easiest exercise on the list. The calves and Achilles absorb roughly eight times your bodyweight on every running footstrike. They deserve more attention than most runners give them.
4. Glute bridges
!Runner performing a bodyweight single-leg glute bridge on a yoga mat in a park
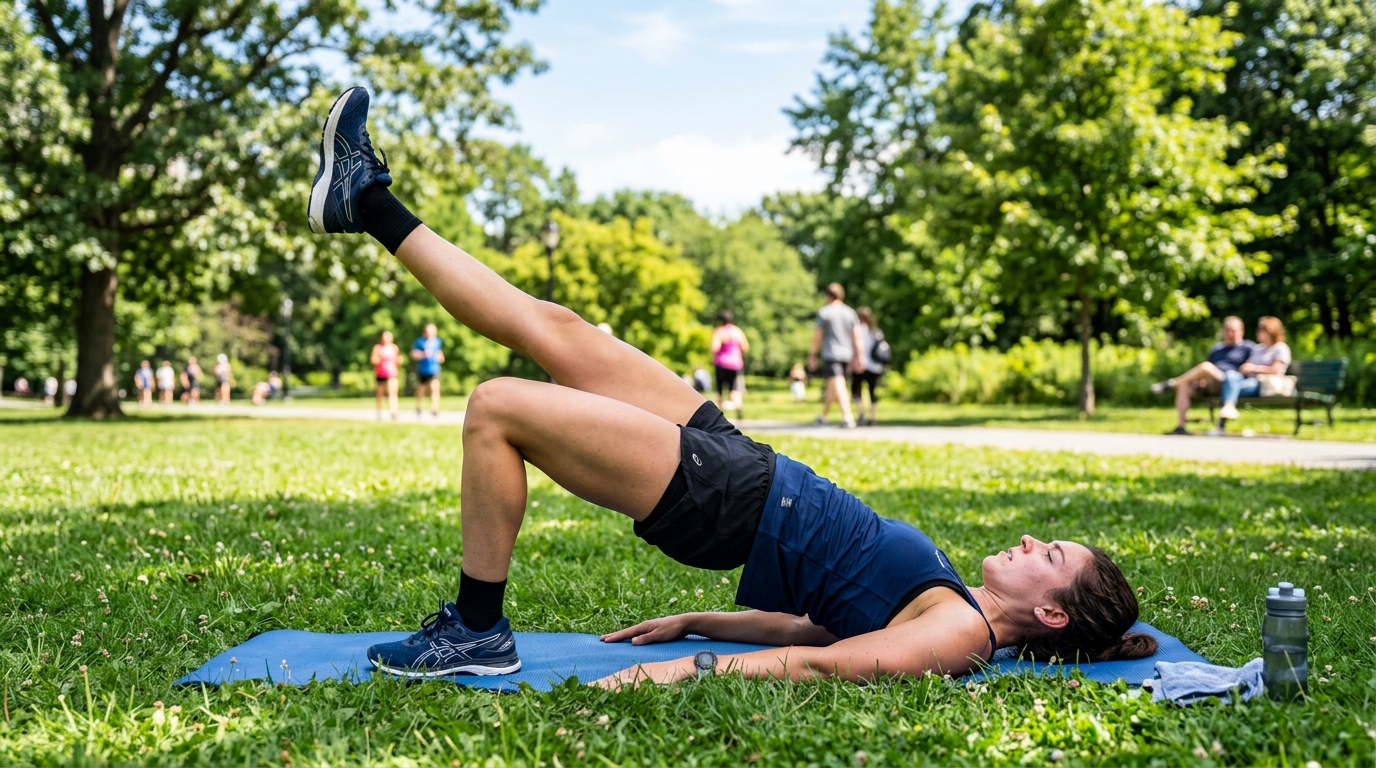
The glute bridge closes the loop by targeting the glutes directly through hip extension - the same movement that drives push-off in running.
Lie on your back with knees bent and feet flat on the floor. Drive through the heels to lift your hips until your body forms a straight line from shoulders to knees. Squeeze the glutes at the top. Lower with control.
This exercise is useful at any level but its value scales significantly when you progress it. Start with two-leg glute bridges, move to single-leg bridges (one foot on the floor, the other leg extended), then progress to elevated bridges with your shoulders on a couch or bench and weight on the hips.
The single-leg version is particularly useful because it again exposes asymmetries between sides. Most runners have a stronger glute on their dominant side. That imbalance shows up in pelvic drop during running, which is a major contributor to IT band syndrome and hip pain. Identifying and addressing the weaker side is more valuable than any amount of even bilateral training.
Three sets of 12 to 15 reps, or three sets of 10 to 12 single-leg.
How to fit two sessions into a running week
The challenge is always scheduling. The simplest approach is to attach strength sessions to running days rather than treating them as separate events that need their own dedicated time.
After an easy run, do the 20-minute session. The total time out is 45 to 50 minutes instead of 30. Alternatively, do it in the morning of a day where you run in the evening - split the training stimulus across the day.
The one day to avoid adding strength is the day before your long run or a key quality session. Your legs will be more fatigued than you expect and it will compromise the session that matters most.
Twice a week is enough to see injury prevention benefits within 6 to 8 weeks. Once a week is enough to maintain the benefits you have built. Zero is where most runners stay and wonder why their knees or Achilles give them trouble every time they ramp up mileage.
Ready to put these sessions into a full training plan? The YourRunGuide run planner lets you build a schedule around your goal race with time for both running and strength built in.